
Install WordPress Locally With XAMPP
XAMPP (cross-platform, Apache, MySQL, PHP, Perl) is an open source web hosting solution stack on Windows, Mac OS X, Linux and Solaris operating systems. You can install it to provide a similar environment as your web host’s server to use WordPress on your computer (locally). This allows you to run WordPress core and display in your browser without being online.
There are some helpful features that a local host can offer for web designers and developers. This tutorial will cover using an all-in-one program. We are going to show you how to quickly setup a local host to run WordPress offline in around 10 minutes with XAMPP. It’s completely free and easy. The WordPress Codex has more information on Installing WordPress if you are interested in learning more. If you liked this tutorial, check out our post on Copying a Live WordPress Website to Your Local Host, which can help you move a live site offline.
Do I Need Live Testing?
Even experts can benefit from local or remote live testing. Sometimes mistakes that are made during development aren’t noticeable until the site is running. There’s a lot of things that can go wrong when testing. The only way to see how certain things work is to test dynamic code in the server environment.
You can make changes online in the WordPress dashboard, but there are many reasons why you might not want to do this. I personally needed to quickly setup XAMPP at one time due to problems with throttling and satellite internet. Let’s just say satellite internet can be a pain in the ass. When you are slowed down to DSL speeds, working offline really helps.
You can perform live tests any editing you do on your site without affecting the online version. This way no one will see any mistakes or pending experiment on your website. Also if you are finished with a site and it has already been launched, more testing can cause downtime and expose security holes.
Plus if you are working for a client, they might want to go online and look at things before you are finished debugging. I’ve been guilty of making a site live before it was finished. I added this in my list of Mistakes to Avoid in WordPress.
This can be embarrassing and very unprofessional. Live testing on a local host is also great for using new plugins and trying them out. With XAMPP you can also run sites built on other platforms like Joomla and Drupal as well.
The Tutorial
*This walkthrough is done on a Windows 7 with the 32 bit version of XAMPP, but the steps for other operating systems are similar. You will just be using different file tree systems, and different versions of XAMPP.
With this method we will use one program to install the web server, database server and the language. There are lots of programs like this so if it doesn’t workout with XAMPP you can find others. A popular stack for Mac users is MAMP (Mac, Apache, MySQL, PHP, Perl or Python). It works very well on Mac OS X.
Now with all the introductory material out of the way, we can get started. There are only a few steps you need to take to have WordPress running on a local host.
- Download the software – XAMPP and WordPress
- Setup and Install XAMPP
- Create database, create user profile for database
- Add WordPress trunk files to XAMPPs htdocs directory
- Connect WordPress to your database and host
- Start Testing!
Downloading the software
First go to the Apache Friends website and download XAMPP

Then go to and get the latest version of WordPress

Next install XAMPP and run the setup. You will be brought to the welcome screen.
 After the welcome screen you will see the Select Components screen. Leave all the components checked and clicked next

Put the files in the C:\xampp directory

Go ahead and skip the next screen

Now you are ready to install

Here it is installing

Then click finish, I won’t open it yet because I want to be sure I run it with administrator permissions, otherwise I will have problems. So I unchecked the box that asks me to start the Control Panel.

Let move our WordPress files to the \htdocs directory now. Everything there can be accessed by a web browser when you run XAMPP. Extract the WordPress folder from the .zip file you downloaded earlier from WordPress.org to C:\xampp\htdocs.

Start the program and run as administrator

When the control panel comes up, start Apache and MySQL and they should be highlighted in green. Those are the only two you need to have on.

Now it’s time to setup your database. Go to http://localhost/phpmyadmin/ in your web browser
 Go to Databases and create a new database. I will choose the name “mydatabase”

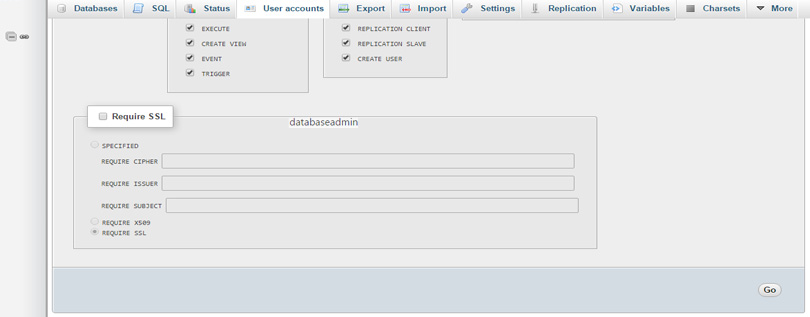
Once the database has been created. Navigate to the Priveleges tab and Add a user account. You will need to use username and password very soon.

Choose your user name and password. You will need this to connect the database to WordPress. My username is databaseadmin and my host is localhost
 Grant all privileges and check all boxes

When you scroll down and hit “go” in the bottom right-hand corner of the webpage page
Finally navigate to http://localhost/wordpress to the install page. You will be asked to pick a language. I will choose English because that’s all I know.
Next there is an information page that informs you what you need to have to create the wp-config .php file.  We just prepared all that information. Add the phpmyadmin username and password you created. Enter local for host, and the Table prefix can be anything you want. The table prefixed, as noted in the above pictures is for adding more than one WordPress in the same database.

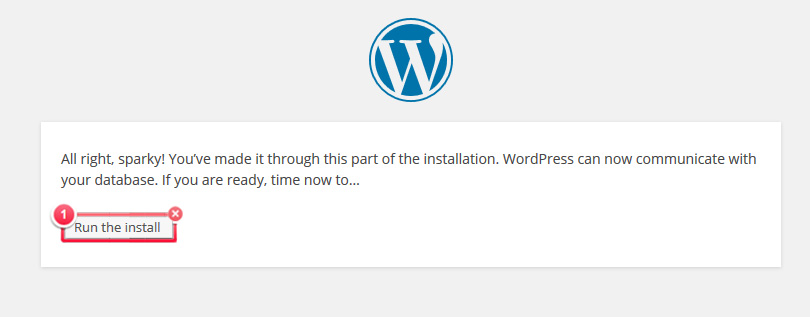
Submit and you should be taken to the install screen in a few moments. Hit “Run the install”
 After you install WordPress, you will be taken to the welcome screen. Choose a WordPress username and password. I chose to discourage sites from indexing this site because I’m only using it offline anyways. When you are done filling out the forms choose to install WordPress.

That’s all there is too it. Now login with the wordpress username and password you just created.
 Next time you navigate to http://localhost/wordpress/ you will be taken to your site.

Go to your dashboard and carry on with WordPress as you would normally. Now you can run your site on your local host, make changes, import and export files etc.

Use WordPress just as you would online. There are a few things that you won’t be able to do, such as uploading themes from the web and using web analytic tools. You can still add plugins or themes by putting them in your WordPress plugin or theme directory. By default these folders are located in C:\xampp\htdocs\wordpress\wp-content folder.
Finishing Up
There are other ways to create local hosting environments, but they require technical knowledge and a little bit more effort. You could install all the install all the separate binaries each server component. Or you could install the components with their source codes. This is the most flexible option, giving you an environment that is more like live website conditions. Both of these methods aren’t easy for beginners, and can be a hassle.
Using a program like XAMPP is the easiest and fastest way to get a local test server up, It’s involves the least amount of work and is preferred by many new developers. The downside is that using an all-in-one solution can lack flexibility. Some components may not match those on the host server you are using. You may be able to recreate the components used by the production server as accurately as you’d like.
The main benefit of using an all-in-one system is that you won’t need any in depth knowledge about web server environments. You can get your instance of WordPress up and running and make changes right away. That’s really why you’d want to set things up this way, for brevity. Let us know if you have any favorite methods for creating a local hosting environment and check out two our two companion posts on how to:


Leave a Reply
Want to join the discussion? Feel free to contribute!