
Creating a Child Theme in WordPress
What is a child theme? Why should you use one? How can you use them to modify an existing theme? These are all questions I aim to answer in this post. No matter how good your theme is you are going to want to customize it for your own use. It could be something as simple as changing the page layout or something more complicated like modifying the functionality of a shopping cart.
You can do this easily in WordPress a number of different ways. The easiest would be to download a plugin, which you could do. But, there is always a better way of doing things and sometimes using a plugin isn’t always best. For simple changes using plugins can be a bit of an overkill and drain your resources.
This is where understanding child themes and how they work can be very helpful. If you want to become a decent WordPress developer, or you just want to have more control over your website – you will definitely benefit from experimenting with child themes. We will explain what child themes are, what they are for and show you how to create your own child theme.
What is a child theme?
The WordPress Codex defines a child theme as:
a theme that inherits the functionality and styling of another theme, called the parent theme. Child themes are the recommended way of modifying an existing theme.
If you know anything about Object Oriented Programming you have probably come across child and parent classes. If not don’t worry, it’s pretty simple and theory isn’t as important as some may think. A child theme is used in WordPress to modify existing themes while keeping the core theme files intact. This is for good reason too. The child theme inherits everything from the parent theme (much like I have inherited my father’s financial debt). All functionality is the same and you can add your own styles and functions whenever you want.
The child theme is a separate set of files that you can alter without touching the original theme. This means no more hacking of the original theme files – which can cause unpredictable results and be a nightmare for collaboration. At any time you can activate the parent theme and start from scratch without resetting the entire site.
This means that any customizing you do is safe from being lost during an update. You won’t have to go back into the core php or css files that you made changes in to re-enter in such an event. This can save you a lot of time and hassle working this way.
Why shouldn’t I modify a WordPress themes core files?
You can always go into the core files of your theme and modify them. The problem with this is that you will lose all of the changes you made each time you update the theme. When you update, WordPress will overwrite all of your theme files with the defaults in the zip file in the themes directory, deleting everything you did. If you don’t mind re-entering all your changes again, than that’s fine. If you never want to update your theme files, you are posing a big security risk and may lose functionality in the future.
Why are child themes useful?
WordPress themes are great. They are flexible and make designing fast and easy. You can use plugins and extensions to get just about anything you need done. Making style changes or adding functionality is often simple with plugins. But you can’t always solve your problems with a plugin.
Somewhere along the line you will most likely want to make custom CSS or PHP changes to modify your site. It can be very frustrating not being able to move something 10 pixels just because you don’t know how to make the proper CSS queries, or can’t locate the right piece of code to modify. Sometimes the quickest and most elegant solution can be overriding the parent theme.
Get to Know Your Child…Theme
Like I said, you can do this with plugins as well, but understanding how to create, modify and implement your own solutions with a child theme is a great way to understand WordPress. You can save hundreds of dollars spent on plugins, as well as learn to develop your own extensions.
If you are willing to spend a bit of time getting to know the structure of WordPress, child themes can be your best friend. Often times child themes are bundled with the purchase of a theme. This makes it easy to just upload and start making changes as you please.
But you should create a few and implement them in different ways if you want to get a better understanding of customizing a WordPress website. Below we have a guide that will show you one way to create a child theme. There is always more than one way to do things. For the most current advice on child themes, checkout the WordPress Codex . It’s not a lot to read but there is a ton of useful information on getting started. The following is designed to help you get your feet wet with. Enjoy!
How to create your own child theme
This video turorial created by WordPress Online and Onsite Training Classes.
You should always activate your child theme before you make any changes you plan to keep on your website. This is because you will be starting basically from scratch – everything will be erased once you activate your child theme. Let’s begin. There are really only a few things you have to do to get started:
- Create a child theme folder
- Create a styles.css file
- Create a functions.php file
- Zip the folder and upload the files
First you will need to create a folder for your child theme. I am on a fresh install of WordPress so I will make a child theme for Twenty Fifteen (the default WordPress theme) just to make things easy. The folder in my themes directory on the server is named “twentyfifteen,” so I will name my child theme folder “twentyfifteen-child.” Go ahead and do that.
Next I want to create my styles.css file and functions.php file. You can create these files in your favorite IDE like NetBeans, Sublime Text 3, Visual Studio or whatever else you got. I am just going to use Windows Notepad to keep things simple.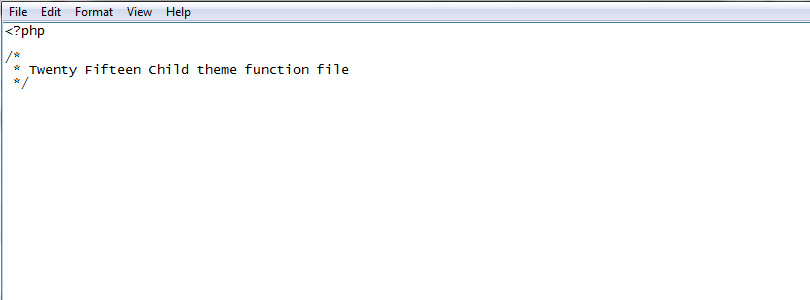
 Below is the code I put for the style.css file if you want to copy it. **There’s actually a syntax error in the screenshot above. Can you spot it? I fixed it in the code below** Also remember, you’ll have to make some changes if you aren’t using Twenty Fifteen. Refer to the WordPress Codex to be sure:
/*
 Theme Name: Twenty Fifteen Child
 Theme URI: http://shadowhuskyrescue.com
 Description: Twenty Fifteen Child Theme
 Author: Adam Krieger
 Author URI: http://shadowhuskyrescue.com
 Template: twentyfifteen
 Version: 1.0.0
 License: GNU General Public License v2 or later
 License URI: http://www.gnu.org/licenses/gpl-2.0.html
 Text Domain: twenty-fifteen-child
 */

 @import url("../twentyfifteen/style.css");
Now all you need to do is zip the file, upload it and you can start making changes. By zipping the files, you won’t even have to use an FTP client to upload your files, although you could. If you don’t know how to add a new theme, checkout our guide on uploading themes and plugins. Upload your zip file and you should see your child theme below. I even added my own, beautiful screenshot. If you want to use your own screenshot just add an 880×660 .png file to the zip folder and name it “screenshot.” Activate your theme and you are good to go.
Now lets make a simple change to show you how it works. Go to appearance on your dashboard menu and select editor. 
After you’ve navigated to Appearance>Editor, WordPress will ask you if you want to enable editor. Click the button to enter the editor. From here we can modify the style.css file we made. Lets make a simple modification to prove it works. To your file add “#page { background-color: red; }” so it look like so:
/*
 Theme Name: Twenty Fifteen Child
 Theme URI: http://shadowhuskyrescue.com
 Description: Twenty Fifteen Child Theme
 Author: Adam Krieger
 Author URI: http://shadowhuskyrescue.com
 Template: twentyfifteen
 Version: 1.0.0
 License: GNU General Public License v2 or later
 License URI: http://www.gnu.org/licenses/gpl-2.0.html
 Text Domain: twenty-fifteen-child
 */
 @import url("../twentyfifteen/style.css");
 #page { background-color: red; }
After you update your the style.css file, the page will have gone from this…

To this…

End Note
That’s all there is to it. Now you that you understand how to custom styles work you can make any changes you want. Coming up we’ll have some more in posts on customization using PHP and CSS. Remember this is just one way to override a parent theme. There are always multiple ways to do things in WordPress. Let us know if you have any requests or questions in the comments below and thanks for reading. Have fun!


Thanks! Nice tutorial, what I needed