
Copying a Live WordPress Site to a Localhost
Today we have a step-by-step walk through on how to move a live WordPress website to a local host. This way you can run WordPress offline. Why would you want to run WordPress offline? Maybe you wan to to play with new plugins or themes or test changes before making them on your live site. Whatever the reason, it’s not hard to do and it doesn’t take long. Anyone can follow this tutorial and quickly have a locally hosted WordPress site. This way you can use WordPress without being connected to the internet.
I made this tutorial because I thought it would be useful. The WordPress Codex is a great reference and can help you do many things, including moving a live site to a local host. For some users, it can be hard to understand. Especially beginner. The language can often seem confusing and convoluted. This tutorial shows you simply how to move your site without the hassle. This is a companion post to our recent article on How to Install WordPress Locally With XAMPP.
We will also be publishing a follow-up post on copying your locally hosted website to a live server. This guide is done on a Windows 7/XAMPP setup, using FileZIlla to download the site files from Bluehost. If you aren’t on Windows, this tutorial may still be helpful as many of the steps are similar. Mac and Linux users can look to the Codex as a reference on how to do this.
Let’s get started. I’ve outlined 5 easy steps to manually move your WordPress website:
- Backup site files via FTP
- Export database from phpMyAdmin on your server
- Import database onto your local server
- Configure your database and site files
- Access your site
Things you need:
- Local host environment setup with XAMPP
- File transfer program like FileZilla to retrieve your site files from the server
- FTP or SFTP login credentials for your live site domain
- phpMyadmin username and password
- Database login credentials: username and pass – we are leaving those the same
- WordPress login credentials: username and pass
Step 1 — Backup Site Files via FTP
Okay, now it’s time to get started. This step is probably the longest, because you will have to wait for all your site files to download via FTP or SFTP. This will vary depending on your internet connection and how many files stored on your server. I am using FTP because that’s the only option my hosting plan with Bluehost has.
Open FileZilla and go to the sitemanager.
 Name it whatever you want.
 Fill in the Host field and port. If you aren’t sure what to put here consult your server. My basic hosting plan only allows me to use plain FTP.
 Then choose ask for password.
 Add your user name and click Connect.
 Enter your password.
 Once you are connected to the host, download all your files to the directory you chose to keep your offline site files in. In my case it’s C:\\xamp\htdocs\all-written. When your files are finished downloading, make sure and back up all the files in a safe location before you alter them in case anything goes wrong. This way you will still have all your files in tact.
Once your files have started downloading a notification will appear. This process may take a while, depending on how many files you have.
Step 2 — Export Database From Your Live Sites phpMyAdmin
While the files from Step 1 are downloading, you can get started on Step 2. Consult your host provider to find out how to access your phpmyadmin. I use Bluehost, so I just like “bluehost find phpmyadmin username and password,” and the search results contained lots of guides on how to do this.
First login to your hosting account.
Once you are logged in, click on the hosting tab and access your cpanel. If you don’t have Bluehost, find out how to access your cpanel. It shouldn’t be too hard to figure out.
Once you are in the cpanel, scroll down to your database tools and click on the phpMyAdmin icon. User your phpMyAdmin username and password to login.
 Once you are logged in, click on the Export tab.
Below you can see the Export panel. Choose Custom export. Name the SQL file whatever you want in the File name template field.
Scroll down and hit Go. Your file will download in a few seconds. Put it in the same place that you plan on backing up your site files you downloaded in Step 1.
Step 3 — Import database onto new server
Now it’s time to import the database you just downloaded to your local host. If you need to know how to setup XAMPP, a free all-in-one local hosting solution, see our tutorial on How to Install WordPress Locally With XAMPP.
First, open XAMPP and start Apache and MySQL. They will be highlighted in green as seen below if everything is working correctly. Once your local server environment is up and running, navigate to localhost/phpmyadmin in your web browser. You will be taken to the page seen below.
 Click on the Import tab to get to the import panel and hit the Choose File button.
 Find the SQL file you saved in Step 3 and open it.
 Once you have chosen the file, scroll down to the bottom of the page and hit Go.
You should be brought to a screen like the one shown below notifying you that the import was successful.
Step 4 — Connect the Database to your Localhost
Now you can connect the database you imported to your offline site. First click on the Databases tab to see a list of the databases that are on the host. Then click on the database you just imported to see the tables it contains.
You will be brought to a page that has a list of all the of your database tables. From there, click on the SQL tab. By running an SQL query, we can switch out every instance of the live URL, with our offline URL.
 Copy and paste the following code into the window:
UPDATE wp_jtjn_options SET option_value = replace(option_value, 'http://www.all-written.com', 'http://localhost/all-written') WHERE option_name = 'home' OR option_name = 'siteurl';
UPDATE wp_jtjn_posts SET post_content = replace(post_content, 'http://www.all-written.com', 'http://localhost/all-written');
UPDATE wp_jtjn_postmeta SET meta_value = replace(meta_value,'http://www.all-written.com','http://localhost/all-written');
UPDATE wp_posts SET guid = REPLACE (guid, 'http://www.all-written.com', 'http://localhost/all-written');
Make sure that you change the code to fit your site. This includes changing the table prefix. Mine is wp_jtjn. Switch out the urls with yours. After you have pasted the code, hit Go. After you successfully run the query, you’ll get a notification letting you know how many rows were affected.
 Now it’s time to go to the directory where you are keeping your offline site files to change the wp_config file. Find the file in your directory, in my case it’s located in C:\xampp\htdocs\all-written
Within the file you can see right around lines 22-32 is where the file points to your database. I am leaving the database name (DB_NAME), database username (DB_USER), and the MySQL database password (DB_PASSWORD) the same. If you notice I changed the MySQL hostname (DB_HOST) to reflect the offline host, which is named localhost. If you go back to your phpMyAdmin panel and go to the Privileges tab. You will see that the username matches as the one in your wp_config file.
Step 5 Accessing Your Offline Site
This is less of a step and more of a victory lap. We need to make sure everything is working properly. Now that you have put your site files in the directory ( mine is C:\xampp\htdocs\all-written ), connected the database to your site, modified the database tables and wp_config file — you can access your site offline as long as XAMPP is running.
In your browser, navigate to your site. In my case it’s localhost/all-written. If you have the same setup I do, it should be localhost/yoursiteurlhere. Voila! Your site will pop up.  Lets try and get into the backend. In my case I will go to localhost/all-written/wp-admin. Use the same credentials you do for your online site and log in.
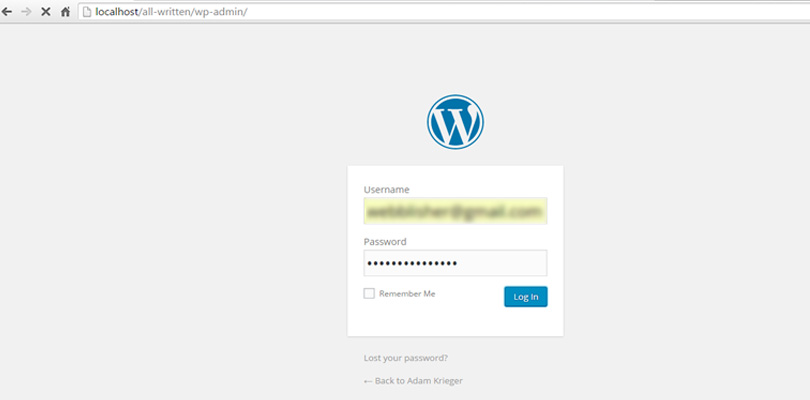 Once you are logged in everything should be the same. You may have problems doing some things that require online connections such as inserting a Google Maps widget on your site.
 You can still do all sorts of things, like play with plugins and change themes. If you want to install or re-install a plugin or theme, just add the folder to your WordPress directory file within /htdocs. I’ll go ahead and make a quick edit to the homepage as an example. Once I am inside the page editor, I will simply add some content from Excited! Testimonials with Visual Composer.
 After I update the page and go view it, the changes will be reflected instantly. This is an awesome way to experiment with plugins and themes.
End Note
Hopefully this post was helpful. There’s all sorts of things that can go wrong. To make things even easier, you can use plugins to copy your site for you as well. Let us know how it works out, or if there’s any way we can improve this tutorial for you in the comments below. I’d be glad to help you troubleshoot any way I can. Coming up we will have another post to help you copy a locally hosted WordPress site to a live host.


Thanks and great tutorial — it’s the most-detailed and helpful one I’ve seen on this subject 🙂 One question, however — if my live site uses SSL, would I need to change ‘http’ to ‘https’ for the sql queries to update the database’s urls?
I am getting this error running th equery.. 1146 – Table ‘_wpx0p.wp_x0p_options’ doesn’t exist
Yes of course, though belated reply
Thank you so much